Introduction
There's something almost magical about watching the northern lights dance across the sky for the first time. The ribbons of green, purple, and pink seem to defy explanation, and your first instinct is to capture that moment forever. But then you pull out your phone, snap a photo, and... nothing. Just a dark, blurry mess.
Don't worry—we've all been there. Aurora photography can seem intimidating at first, with all the talk of ISO settings, long exposures, and specialized gear. But here's the good news: capturing stunning northern lights photos is absolutely achievable for beginners, and you don't need to spend thousands on equipment to get started.
This guide will walk you through everything you need to know to photograph your first aurora. We'll keep things simple, explain the jargon, and focus on practical tips you can use right away. By the end, you'll have the confidence to venture out into the cold and come back with photos that actually do justice to what you witnessed.
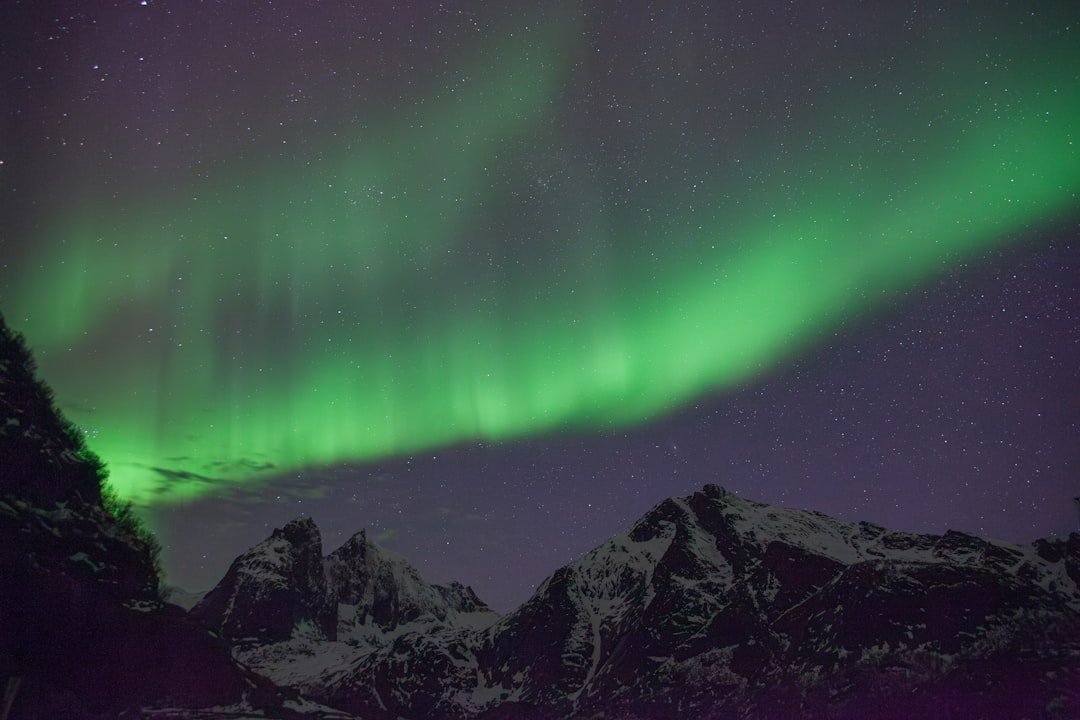
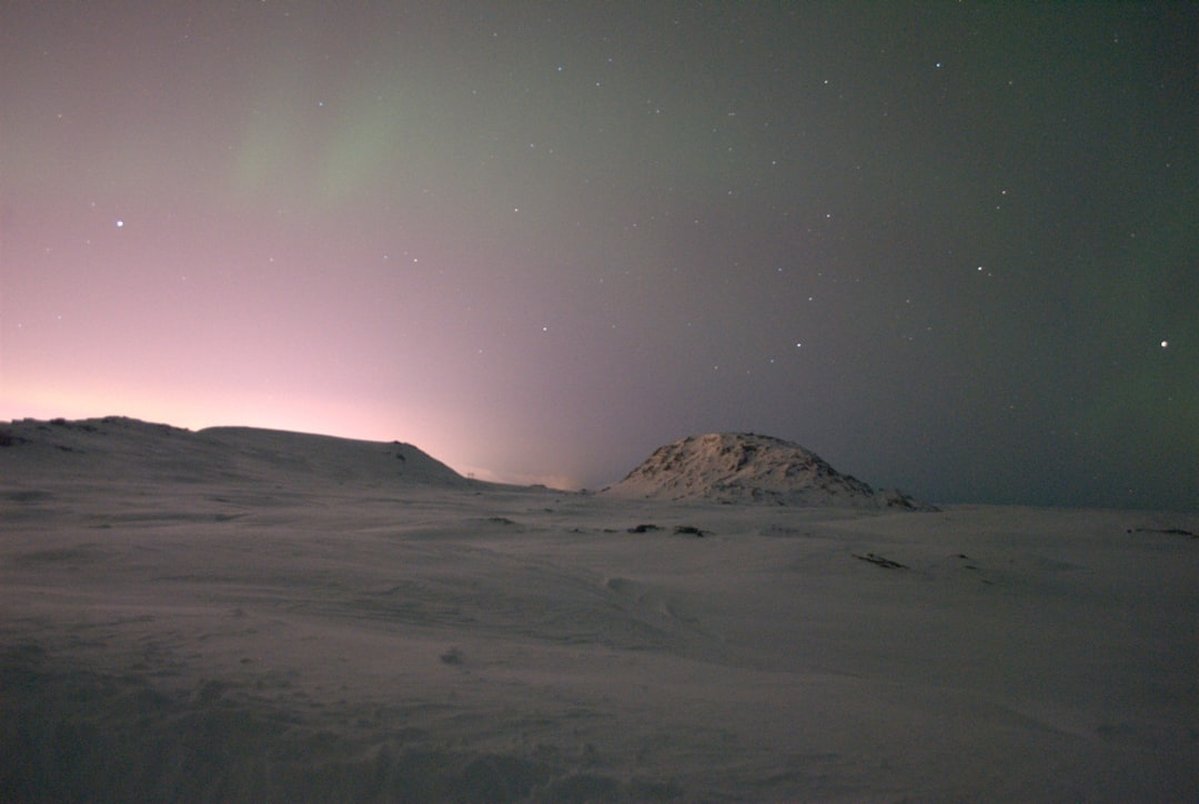
Photo by Klaudia Borowiec on Unsplash
What is Aurora Photography?
Aurora photography is the art of capturing the northern lights (aurora borealis) or southern lights (aurora australis) with a camera. Unlike regular photography, it requires special techniques because you're photographing a faint, moving light source in complete darkness.
The northern lights are caused by charged particles from the sun colliding with gases in Earth's atmosphere. These collisions create the spectacular light shows we see dancing across polar skies. The most common color is green, produced by oxygen molecules, while reds, purples, and blues appear during stronger displays.
Why can't you just point and shoot?
Your eyes are incredibly good at gathering light in dark conditions, but cameras need help. To capture auroras, you need to let your camera's sensor collect light for several seconds—something called a "long exposure." This is why phone photos often fail; they're designed for quick snapshots, not gathering faint light over time.
The good news is that modern cameras—including many smartphones from 2024 onwards—now have "night modes" or manual settings that make aurora photography more accessible than ever before.
Why Should You Care About Capturing the Aurora?
Photographing the northern lights isn't just about getting a pretty picture for social media (though that's a nice bonus). Here's why learning this skill is worth your time:
Preserve a Once-in-a-Lifetime Experience
Aurora displays are unpredictable and never exactly the same twice. When you capture one successfully, you're preserving a unique moment in time that will never repeat. Years from now, you'll be able to look back at your photo and remember exactly how it felt to stand under those dancing lights.
Share the Wonder with Others
Many people will never see the northern lights in person. Your photos can bring that magic to friends, family, and others who may never have the opportunity to travel north. There's something deeply satisfying about showing someone an aurora photo and watching their eyes light up.
Develop Valuable Photography Skills
The techniques you learn for aurora photography—manual camera settings, long exposures, working in low light—transfer directly to other types of photography like astrophotography, night cityscapes, and creative light painting. You're not just learning one skill; you're building a foundation.
Enhance Your Northern Adventure
Knowing how to photograph the aurora adds another dimension to your trip. Instead of just watching passively, you become an active participant, anticipating the lights' movements and working to capture the perfect shot. It makes the whole experience more engaging and memorable.
Getting Started: What You Actually Need
Let's cut through the noise about gear. While professional photographers use expensive equipment, you can capture impressive aurora photos with much simpler setups. Here's what you really need:
-
This can be a DSLR, mirrorless camera, or even a smartphone with a pro/manual mode or dedicated night photography app
-
Non-negotiable for long exposures. Even a budget $30 tripod works—just make sure it's stable in wind
-
Cold temperatures drain batteries fast. Keep spares warm in your pocket
-
You'll be taking many shots. Bring at least 32GB, preferably 64GB or more
-
You'll be standing still in the cold for hours. Dress warmer than you think necessary
-
Red light preserves your night vision while letting you see your camera controls
What about lenses?
If you're using an interchangeable lens camera, a wide-angle lens (14-24mm on full frame, 10-18mm on crop sensor) is ideal for capturing sweeping aurora displays. A "fast" lens with a maximum aperture of f/2.8 or wider is helpful but not essential for beginners.
If you're using your kit lens (the one that came with your camera), don't worry—you can absolutely get great results. You may just need slightly longer exposures.
| Gear Level | Camera | Lens | Budget |
|---|---|---|---|
| Beginner | Smartphone with night mode | Built-in | $0 (use what you have) |
| Enthusiast | Entry-level mirrorless/DSLR | Kit lens (18-55mm) | $500-800 |
| Dedicated | Mid-range mirrorless | Fast wide-angle (f/2.8) | $1,500-2,500 |
Basic Concepts: Understanding Your Camera Settings
Here's where aurora photography can seem overwhelming—all those numbers and settings! Let's break down the three essential settings you need to understand, explained in plain English.
ISO: Your Camera's Light Sensitivity
Think of ISO as your camera's ability to "see in the dark." A higher ISO number means your camera is more sensitive to light, which is great for dark conditions. The tradeoff? Higher ISO also creates more "noise"—that grainy, speckled look in photos.
For aurora photography: Start with ISO 1600-3200. Modern cameras handle these levels well without too much noise.
Aperture: How Wide Your Lens Opens
Aperture is measured in f-stops (like f/2.8 or f/4). Confusingly, a smaller number means a larger opening, letting in more light. Think of it like your eye's pupil—wider pupil, more light.
For aurora photography: Use the widest aperture your lens allows (lowest f-number). If your lens goes to f/2.8, use that. If it only goes to f/4 or f/5.6, that's okay—you'll just compensate with other settings.
Shutter Speed: How Long the Light Collects
Shutter speed is how long your camera's sensor is exposed to light. For aurora photography, we use "long exposures" of several seconds. This is why you need a tripod—any camera movement during those seconds creates blur.
For aurora photography: Start with 10-15 seconds. If the aurora is moving quickly (dancing/pulsing), use shorter exposures (5-8 seconds) to capture detail. If it's a slow, gentle glow, you can go longer (15-25 seconds).
Photo by Annie Spratt on Unsplash
The Beginner's Starting Recipe
Not sure where to begin? Try these settings as your starting point and adjust from there:
- ISO: 1600
- Aperture: Widest available (lowest f-number)
- Shutter Speed: 10 seconds
- Focus: Manual focus set to infinity (more on this below)
- White Balance: Auto or Daylight
Take a test shot and check your screen. Too dark? Increase ISO or shutter speed. Too bright or washed out? Decrease them. Aurora photography involves constant adjustment as conditions change.
Common Beginner Mistakes to Avoid
Learning from others' mistakes will save you frustration in the field. Here are the most common errors beginners make—and how to avoid them:
Mistake #1: Forgetting to Focus Manually
Autofocus doesn't work in the dark. Your camera will "hunt" back and forth trying to find something to lock onto, and your shots will be blurry. Switch to manual focus before the aurora appears and set your lens to infinity focus. Many lenses have an "∞" symbol—but don't just turn to the end of the focus ring, as infinity isn't always at the physical limit.
The fix: Before it gets dark, focus on something far away (a distant mountain, the horizon). Mark that position with tape if needed. Alternatively, use "live view" to zoom in on a bright star and manually adjust until it's a sharp point.
Mistake #2: Not Bringing Enough Batteries
Cold weather is brutal on batteries. A battery that lasts hours in normal conditions might die in 30 minutes when it's -20°C (-4°F). There's nothing worse than finally seeing a spectacular display and having your camera shut down.
The fix: Bring at least 3-4 fully charged batteries. Keep spares in an inside pocket close to your body. When one dies, swap it with a warm one and put the cold battery in your pocket—it will often recover some charge as it warms up.
Mistake #3: Using Too Long an Exposure
It's tempting to use very long exposures (30+ seconds) to gather more light, but this causes two problems: the aurora's movement becomes a blurry smear, and stars turn into streaks instead of points due to Earth's rotation.
The fix: Keep exposures under 20 seconds for most situations. If you need more light, increase ISO instead of shutter speed. A slightly noisier photo with sharp aurora detail is better than a smooth but blurry one.
Mistake #4: Chimping Too Much
"Chimping" means constantly checking your camera's screen after every shot. This seems harmless, but the bright screen ruins your night vision, making it harder to see faint auroras developing. It also distracts you from actually watching the show.
The fix: Dim your camera's screen brightness to the minimum. Take several shots before reviewing. Better yet, enjoy the aurora with your eyes between shots—the camera will still be there.
Mistake #5: Only Shooting the Aurora
Photos of just sky and aurora can be beautiful, but they often lack context and impact. Without something in the foreground, viewers can't sense the scale or location.
The fix: Include interesting foreground elements—trees, mountains, cabins, frozen lakes, even your own silhouette. These elements anchor the image and tell a story.
- Modern cameras make aurora photography more accessible than ever
- Basic techniques can be learned in one evening
- Even smartphone night modes can capture decent aurora shots
- Post-processing can salvage imperfect exposures
- Cold weather makes everything more challenging
- Aurora activity is unpredictable—you might wait for hours or days
- The learning curve for manual settings takes practice
- Best results still require dedicated camera equipment
Your First Aurora Shoot: A Step-by-Step Guide
Ready to put theory into practice? Here's exactly what to do when you head out for your first aurora photography session.
Before You Leave
-
Check the aurora forecast. Apps like My Aurora Forecast, Space Weather Live, or the NOAA Aurora Forecast show predicted activity levels (Kp index). Anything Kp 3 or higher is worth going out for, though Kp 5+ offers the best chances for spectacular displays.
-
Check the weather. Clear skies are essential—you can't photograph the aurora through clouds. Look for a location with clear conditions, even if it means driving a bit.
-
Scout your location in daylight. Find a spot away from city lights with an interesting foreground. Familiarize yourself with the terrain so you're not stumbling around in the dark.
-
Charge all batteries and format your memory card.
-
Dress in layers. You'll be standing still for hours. Bring more warm clothing than you think you need, including hand warmers for your pockets.
Setting Up on Location
-
Arrive before dark. This gives you time to set up, find your composition, and practice focusing while you can still see.
-
Set up your tripod on stable ground. If it's windy, hang your camera bag from the center column for added stability. Extend the thicker leg sections first.
-
Compose your shot. Include interesting foreground elements and leave plenty of sky. The aurora might appear anywhere from the horizon to directly overhead.
-
Set focus to manual and focus on infinity. Use a distant object or a bright star in live view.
-
Dial in your starting settings: ISO 1600, widest aperture, 10-second shutter speed.
-
Take test shots of the stars. If stars look sharp, you're focused correctly. If they're blurry blobs, adjust your focus.
When the Aurora Appears
-
Don't panic! It's exciting, but you have time. Auroras typically last for hours, not seconds.
-
Take a test shot with your starting settings. Check the exposure—adjust ISO up or down as needed.
-
Watch the aurora's behavior. If it's slowly glowing, use longer exposures (15-20 seconds). If it's actively dancing, shorten to 5-8 seconds to capture the movement and structure.
-
Vary your compositions. Shoot vertical and horizontal. Include more or less foreground. Try different focal lengths if you have them.
-
Check focus periodically. Temperature changes can cause focus drift, especially with some lenses.
-
Take plenty of shots. Memory cards are cheap, and conditions change rapidly. You can delete the bad ones later.
-
Remember to enjoy it! Don't spend the entire time staring at your camera screen. Watch with your eyes—the experience is the real treasure.
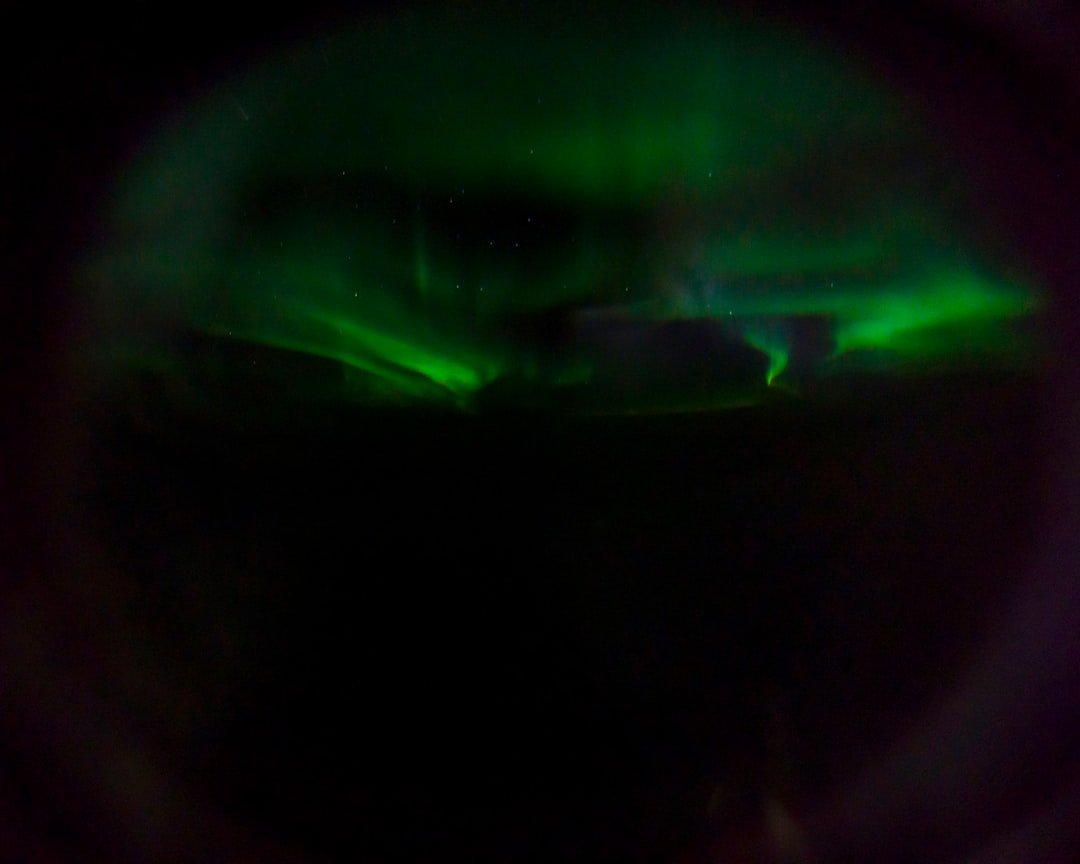
Photo by Benjamin R. on Unsplash
Timing Your Aurora Hunt: When and Where to Go
Timing is everything in aurora photography. You need the right conditions to align: solar activity, dark skies, clear weather, and nighttime hours.
Best Time of Year
The aurora occurs year-round, but you can only see it when it's dark. This means:
- September to March is prime season in the Northern Hemisphere
- Late September/early October and late February/March offer the best balance of dark nights and milder temperatures
- December/January has the longest nights but also the coldest temperatures
- Avoid mid-summer in Arctic regions—the midnight sun means no darkness for aurora viewing
Best Time of Night
Aurora activity typically peaks between 10 PM and 2 AM local time, though displays can occur anytime it's dark. Plan to be out for several hours—the aurora rarely performs on a schedule.
Moon Phase Matters
A bright full moon washes out fainter auroras and creates harsh shadows in your photos. Aim for nights within a week of the new moon for the darkest skies and most vivid aurora colors.
Top Destinations for Beginners in 2026
- Tromsø, Norway: Excellent infrastructure, aurora tours, and relatively mild coastal climate
- Fairbanks, Alaska: High aurora frequency, dark skies, and good road access to viewing spots
- Abisko, Sweden: Famous for the "blue hole" of Abisko—clear skies when surrounding areas are cloudy
- Yellowknife, Canada: One of the best aurora-viewing locations in North America
- Iceland: Stunning landscapes, though weather can be unpredictable
Next Steps: Improving Your Aurora Photography
Once you've captured your first successful aurora photos, you'll likely want to take your skills further. Here's where to go from here:
Learn Basic Photo Editing
Even great aurora photos benefit from post-processing. Learning to adjust exposure, contrast, and color balance in software like Lightroom, Capture One, or free alternatives like Darktable can dramatically improve your results. RAW files (if your camera supports them) give you much more editing flexibility than JPEGs.
Experiment with Compositions
Once you're comfortable with the technical basics, focus on creating more compelling images. Try foreground reflections in still water, silhouettes of people or trees, or panoramic stitches for epic wide shots.
Try Aurora Timelapses
Setting your camera to take continuous shots (using an intervalometer) lets you create stunning timelapse videos showing the aurora's movement over time. This requires extra battery power and storage but produces incredible results.
Invest in Better Gear Gradually
If you catch the aurora photography bug, consider upgrading to a faster lens (f/2.8 or wider) or a camera with better high-ISO performance. But master the basics first—gear is no substitute for understanding light and composition.
Ready to Plan Your Aurora Adventure?
Check out our comprehensive destination guides for the best aurora viewing locations, including local tips, seasonal advice, and accommodation recommendations.
Explore Aurora DestinationsFrequently Asked Questions
Conclusion
Aurora photography might seem technical at first, but don't let that intimidate you. Thousands of beginners capture stunning northern lights photos every year, and with the knowledge you've gained from this guide, you're well-prepared to join them.
Remember, the perfect aurora photo isn't about having the most expensive gear or memorizing complex settings. It's about being prepared, understanding the basics, and—most importantly—actually getting out there under the dancing lights.
Your first attempts might not be gallery-worthy, and that's completely okay. Every aurora photographer started somewhere, and each outing teaches you something new. The cold fingers, the hours of waiting, the occasional disappointment when clouds roll in—these are all part of the journey.
But when everything aligns and you capture that magical moment when the sky comes alive with color, you'll understand why so many of us keep coming back to the cold, dark northern nights, cameras in hand, waiting for the lights to dance.
Now grab your camera, check the forecast, and start planning your first aurora photography adventure. The northern lights are waiting.
The aurora borealis is one of nature's most spectacular phenomena, and learning to photograph it opens up a whole new way of experiencing the northern wilderness.
Comments
No comments yet. Be the first to comment!
Leave a Comment